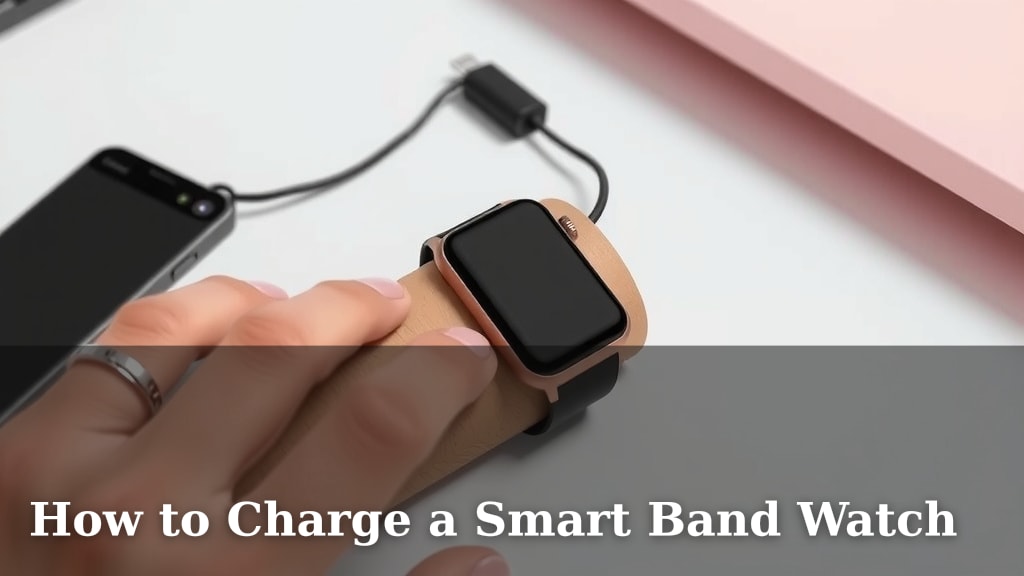
How to Charge a Smart Band Watch
Charging your smart band watch is generally a straightforward process. Most smart bands use a proprietary charging cable that snaps magnetically or plugs into a specific port on the device. Simply connect the cable to a power source, like a USB wall adapter or a computer’s USB port, and then attach it to your watch. You should see an indicator on your watch screen confirming it’s charging.
Keeping your smart band powered up ensures you don’t miss notifications, track your workouts, or monitor your health metrics. Different models may have slightly varying charging times and methods, but the core steps remain similar. We’ve researched the most common ways to get your watch back to 100%.
- Most smart bands charge via a special USB cable.
- Connect the cable to your watch and a power source.
- Look for a charging indicator on your watch screen.
- Ensure you use the correct charging cable for your model.
Below, we’ll walk you through the common charging methods and offer some tips to keep your smart band powered up and ready to go.
Powering Up Your Smart Band: A Simple Guide
Keeping your smart band charged is key to enjoying all its features. You want it ready to track your steps, buzz with notifications, or monitor your sleep. So, how do you actually get that power flowing? It’s usually quite simple. Most smart bands come with their own charging solution. This means you’ll likely use a special cable designed just for your device.
Understanding Your Smart Band’s Charging Cable
The most common way to charge your smart band is with its proprietary charging cable. You won’t typically find a standard USB-C or micro-USB port on the band itself. Instead, these cables are designed to connect easily to the band’s charging contacts.
Types of Smart Band Chargers
You’ll usually see one of two main types of charging cables for smart bands:
- Magnetic Chargers: These are very popular. The charging end of the cable has magnets that align with charging pins on the back of your smart band. It just snaps into place, making it super convenient.
- Clip or Cradle Chargers: Some bands use a small clip or a cradle that you place the band into. This adapter then connects to a USB cable. These ensure a secure connection.
We found that magnetic chargers are generally the easiest to use. They just click into place, so you don’t have to fiddle with ports.
Why a Specific Cable?
Manufacturers use these specific chargers for a few reasons. They help ensure a water-resistant seal on your device. Plus, they often provide a more secure connection than a standard port. Trying to use the wrong charger could damage your band or just not work at all. Always use the cable that came with your smart band.
The Charging Process Step-by-Step
Ready to get some juice into your smart band? Let’s break down the steps. It’s less complicated than you might think.
Connecting the Charger to Your Band
First, identify the charging port or contacts on your smart band. You’ll usually find them on the underside of the device. Then, take your special charging cable. Align the connector with the charging area on your band. If it’s a magnetic charger, it will likely pull itself into the correct position. For clip-style chargers, gently attach the clip or place the band in the cradle.
You should feel or hear a small click, or see the charger settle firmly into place. This connection is essential for power transfer. Make sure it feels secure before moving on.
Connecting to a Power Source
Once your band is connected to the charger, you need to plug the other end of the cable into a power source. Here are your common options:
- USB Wall Adapter: This is the fastest way to charge. Use any standard USB wall adapter you have for your phone or tablet.
- Computer USB Port: You can plug the charging cable into a USB port on your laptop or desktop computer. This is often slower than a wall adapter.
- Power Bank: A portable power bank is another great option, especially when you’re on the go.
Many experts recommend using a wall adapter for the quickest charge time (Cleveland Clinic). Just ensure the adapter isn’t an older, very high-output model that could potentially overwhelm a smaller device, though most modern bands have built-in safeguards.
Confirming the Charge
How do you know if it’s actually charging? Your smart band should give you a clear signal. Look at the watch screen. You’ll typically see a charging icon appear. This might be a battery symbol with a lightning bolt, or a percentage counter that starts to increase.
Some bands might also vibrate briefly when charging begins. If you don’t see any indication after a minute or two, check both ends of the connection. Ensure the cable is firmly attached to the band and the power source is active. Sometimes, unplugging and replugging can resolve the issue.
How Long Does Charging Take?
Charging times can vary quite a bit depending on your smart band model and the power source you use. Generally, most smart bands can go from empty to fully charged in about 1 to 2 hours.
Factors Affecting Charge Time
Several things can influence how long it takes to charge:
- Battery Size: Larger batteries take longer to fill up.
- Charger Wattage: A higher-wattage charger (like a fast-charging phone adapter) can sometimes speed things up, though your band will only draw the power it’s designed for.
- Power Source: As we mentioned, a wall adapter is usually faster than a computer’s USB port.
- Band Usage While Charging: If your band is constantly active, syncing data, or displaying a lot, it might charge slightly slower.
We found that most users don’t need to worry too much about charge times. Just plug it in when you’re sitting down for a bit, like before bed or while you work, and it should be ready when you need it.
Troubleshooting Common Charging Issues
What if your smart band just isn’t cooperating? Don’t panic! Most charging problems are easily fixed.
Checking Connections and Cleanliness
The most frequent culprit? Dirty charging contacts. Over time, sweat, dirt, and lotions can build up on both the band’s charging pins and the charger itself. This gunk can block the electrical connection.
Here’s what to do: Gently clean the charging contacts on your band and the connector on your cable with a dry, soft cloth or a cotton swab. For stubborn grime, you can lightly dampen the swab with isopropyl alcohol. Let everything air dry completely before trying to charge again. This simple step solves a surprising number of issues (Healthline).
Ensuring the Right Cable and Power Source
Are you absolutely sure you’re using the correct charging cable? We know it can be tempting to grab a similar-looking cable from another device. However, using the wrong charger can cause problems. Double-check that the cable and connector are designed specifically for your smart band model.
Also, try a different power source. If you’re using a computer, try a wall adapter. If you’re using one adapter, try another. This helps rule out a faulty power outlet or adapter.
Restarting Your Smart Band
Sometimes, a simple restart can help. If your band has a screen or a button, try turning it off and then back on. This can clear any temporary glitches that might be preventing charging. Consult your band’s manual if you’re unsure how to restart it.
Keeping Your Smart Band Powered and Ready
A little bit of routine care can go a long way in keeping your smart band charged and functioning well.
A Quick Charging Checklist
Here’s a handy checklist to keep in mind:
- Use the original or a certified charger.
- Ensure contacts are clean and dry.
- Connect the charger firmly to the band.
- Plug into a reliable power source.
- Look for the charging indicator on the screen.
- Give it enough time to fully charge.
By following these steps and tips, you’ll ensure your smart band is always ready to help you track your day, stay connected, and reach your fitness goals. Happy charging!
Conclusion
You’ve now learned the straightforward steps to keep your smart band charged and ready for action. Remember, using the correct proprietary cable and ensuring clean charging contacts are your best bets for a smooth experience. Most bands charge quickly, often within a couple of hours, so a little planning is all you need. You can confidently power up your device and focus on tracking your fitness and staying connected. Regularly check your connections and you’ll minimize any charging headaches.
Frequently Asked Questions
How do I know if my smart band is charging?
Your smart band will usually display a charging indicator on its screen, like a battery icon with a lightning bolt or a percentage counter. Some bands might also give a slight vibration when charging begins. If you don’t see any indication, double-check the charger connection.
Can I use a phone charger to charge my smart band?
You should only use the original charging cable that came with your smart band or a certified replacement. While some might look similar, using an incompatible charger could potentially damage your device or fail to charge it properly.
My smart band isn’t charging, what should I do?
First, check that the charging contacts on both your band and the cable are clean and dry. Then, ensure the cable is firmly connected to both the band and a working power source. Trying a different USB port or wall adapter can also help diagnose the issue.
How often should I charge my smart band?
This depends on your specific model and how you use it. Most users find they need to charge their smart band every few days, or when the battery level gets low. It’s often convenient to charge it overnight or while you’re at your desk.
Is it bad to leave my smart band plugged in all night?
Most modern smart bands have safeguards to prevent overcharging, so it’s generally safe to leave them plugged in overnight. They will stop charging once they reach 100%. However, for optimal battery health, some experts suggest unplugging once fully charged if possible.